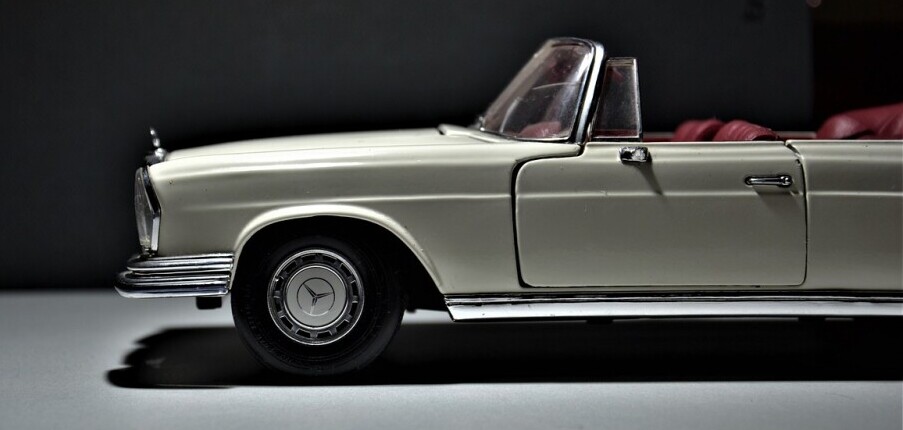
Thinking of restoring a classic Mercedes? It’s a rewarding journey that combines passion, patience, and a well-equipped toolbox. In this guide, I’ll walk you through the essential tools and steps to get started, from picking out the right tools to organising parts and tackling repairs. Let’s dive in and find out essential tools for restoring your classic Mercedes
1. Gather Essential Tools and Equipment
Before you start, make sure your toolkit is complete. Here’s what you’ll need to get rolling:
- Basic Hand Tools: A good socket set and a variety of wrenches are must-haves. Invest in quality here—these will be with you through every nut and bolt!
- Specialized Automotive Tools: For older Mercedes models, tools like a timing light for the ignition system and an engine hoist for removing the engine safely are invaluable. Heavy lifting can take a toll, so work smart with the right equipment.
- Diagnostic Tools: Classic Mercedes diagnostic tools are essential for identifying issues and keeping vintage models running smoothly. Unlike modern vehicles, older Mercedes cars (pre-1990s) don’t have onboard computers or OBD-II ports. Instead, these classic models require a mix of analog tools and specialised Mercedes diagnostic equipment. Here are some key tools for diagnosing common issues in classic Mercedes models:
1. Multimeter
- Purpose: A multimeter measures voltage, current, and resistance in the electrical system. This is crucial for troubleshooting battery, alternator, and wiring issues.
- Recommended Tools: Fluke multimeters are popular for their durability and precision.
- Resource: Multimeters on Amazon.
2. Timing Light
- Purpose: A timing light helps adjust the ignition timing, which is vital for optimal engine performance in older models.
- How It Works: Attach the timing light to the ignition system to verify that the spark plugs fire at the correct time.
- Resource: Timing Lights on Summit Racing.
3. Vacuum Pressure Gauge
- Purpose: Older Mercedes engines rely heavily on vacuum systems for components like fuel delivery and brake power assist. A vacuum gauge helps diagnose leaks or other vacuum-related issues.
- How It Works: Connect the gauge to the vacuum lines to check for any leaks or inconsistencies in pressure.
- Resource: Vacuum Gauges on Harbor Freight.
4. Compression Tester
- Purpose: A compression tester checks each cylinder’s compression, which is critical for engine health and diagnosing issues with the head gasket, valves, and piston rings.
- How It Works: The tester screws into the spark plug holes to measure the pressure each cylinder produces when cranked.
- Resource: Compression Testers on AutoZone.
5. Fuel Pressure Gauge
- Purpose: Older Mercedes models use mechanical or early electronic fuel injection systems. A fuel pressure gauge ensures the system is delivering the correct pressure to the engine.
- How It Works: Connect the gauge to the fuel system and observe readings to ensure they’re within the manufacturer’s specifications.
- Resource: Fuel Pressure Gauges on JEGS.
6. Dwell Meter (Tach-Dwell Meter)
- Purpose: Classic Mercedes models with point-style ignitions need a dwell meter to measure the angle (or dwell) that the points are closed, which affects spark timing.
- How It Works: Connect to the ignition system to adjust the points to the correct dwell angle, ensuring optimal engine performance.
- Resource: Dwell Meters on eBay Motors.
7. Mercedes-Benz Service Manual (Physical or Digital)
- Purpose: Service manuals provide exact specifications, wiring diagrams, and diagnostic steps unique to each model. Original manuals are extremely valuable for restoring and troubleshooting.
- Resource: Mercedes-Benz Classic Parts and Manuals.
8. Analog Scan Tool (Pre-OBD Diagnostics)
- Purpose: Early Mercedes-Benz models from the 1980s began using limited diagnostic ports. While they’re not as advanced as modern OBD scanners, specialized analog diagnostic tools, like the HHT (Hand-Held Tester), are useful for certain systems.
- Resource: Vintage Mercedes-Benz Diagnostic Tools on eBay.
- Online Resources: Sites like Mercedes Benz Classic Parts and Hemmings offer parts and original manuals, which are gold mines for finding elusive components and detailed information.
After the analog scan tools, Mercedes-Benz began introducing early digital diagnostic tools that bridged the gap between basic analog systems and the modern OBD (On-Board Diagnostics) systems. These tools were primarily used in the late 1980s through the early 2000s and include both Mercedes-specific diagnostic devices and standardized OBD I and OBD II tools. Here’s an overview of these early diagnostic tools:
1. HHT (Hand-Held Tester)
- Introduction: The HHT, developed by Mercedes-Benz, was among the first digital diagnostic tools used by the brand. It was primarily used in Mercedes models from the late 1980s to the early 1990s.
- Purpose: The HHT could read fault codes, perform basic diagnostics, and clear codes for a variety of systems, including the engine, ABS, and transmission.
- Compatibility: This tool was particularly common for models like the W124, W126, and early W140, along with early models of the SL-Class and E-Class.
- Access: While no longer produced, you can sometimes find HHTs on sites like eBay or through Mercedes-specific forums and classic car communities.
2. Early OBD I (On-Board Diagnostics I) Systems
- Introduction: Mercedes started including OBD I diagnostic ports in certain models from the early 1990s, but these were more limited than OBD II in terms of diagnostic reach and standardization.
- Purpose: The OBD I system allowed basic diagnostics of the engine control module (ECM) but did not cover all systems. With the right adapter and a compatible scan tool, users could read limited fault codes related to emissions and engine performance.
- Access: OBD I diagnostic adapters are available online. Some tools, like the Actron CP9015, are compatible with OBD I, and others can be found on platforms like Amazon.
3. Mercedes-Benz Star Diagnostic System (SDS)
- Introduction: The Mercedes-Benz Star Diagnostic System (often called Star DAS, or Diagnostic Assistance System) was introduced in the mid-1990s, setting the standard for digital diagnostics in Mercedes vehicles.
- Purpose: SDS was a professional tool used by dealerships and specialized garages, capable of performing in-depth diagnostics, programming, and testing across various modules (engine, transmission, ABS, airbag systems, etc.).
- Compatibility: Primarily for models from the W202, W210, and later, this tool marked a significant step forward, covering all systems and not just engine diagnostics.
- Access: While newer versions are still used in Mercedes service centers, used Star Diagnostic Systems can sometimes be purchased for home use, though they can be costly. Used units are often available on eBay Motors.
4. Carsoft 7.4 Mercedes Software
- Introduction: Carsoft 7.4 was a popular aftermarket diagnostic tool developed in the late 1990s specifically for European cars, including Mercedes.
- Purpose: Carsoft allows users to run diagnostics on multiple systems, including ABS, SRS, transmission, and engine management systems. While not as comprehensive as SDS, it was a good option for DIY enthusiasts and independent shops.
- Compatibility: Carsoft 7.4 works on most Mercedes models from the 1980s to early 2000s, including models like the W124, W126, and early W210.
- Access: This software and adapter kit can sometimes be found through specialized tool retailers or online at sites like Carsoft International.
5. OBD II Scanners (After 1996)
- Introduction: By 1996, the U.S. mandated that all cars sold must have an OBD II port, and Mercedes integrated OBD II capabilities into their models from this year forward.
- Purpose: OBD II is the most commonly used diagnostic system in vehicles today, allowing users to read fault codes, check live data, and clear codes across the engine and emissions systems.
- Compatibility: Works on all Mercedes models from 1996 onward. Tools range from basic OBD II scanners to more advanced scanners that read additional Mercedes-specific codes.
- Access: Affordable OBD II scanners are widely available on Amazon and AutoZone.
6. iCarsoft MB II and MB V2.0
- Introduction: iCarsoft offers affordable scanners specifically tailored to Mercedes-Benz models, including both older OBD I and later OBD II models.
- Purpose: These scanners provide access to advanced diagnostics beyond engine codes, including ABS, SRS (airbags), and transmission. They’re ideal for DIY enthusiasts looking for in-depth diagnostics on a budget.
- Compatibility: Covers most Mercedes models from the 1990s through early 2000s and beyond.
- Access: Available on iCarsoft and Amazon, these tools offer an affordable option for Mercedes-specific diagnostics.
2. Prioritize Safety Gear
Safety might not be the glamorous part of restoration, but it’s essential. Equip yourself with:
- Gloves, Goggles, and a Mask: These protect against grime, dust, and sharp edges. Quality safety gear can help you work confidently and avoid unnecessary injuries.
Having your safety gear in place ensures you can enjoy every part of this journey without compromising your health.
3. Create a Game Plan for Restoration
Before diving in, take time to assess the condition of your car and build a realistic plan. Here’s how to get started:
- Assess Your Vehicle’s Condition: Each classic car has its own quirks, so take a thorough inventory of its current state. Check for any rust, worn parts, or outdated wiring that might need attention.
- Document Everything: Snap photos, label parts, and make notes. This organization will be a lifesaver when reassembling the car later on.
4. Begin the Disassembly Process
Now it’s time to start taking things apart. The key here is organization—disassembly can quickly get chaotic, but these tips can help:
- Label Parts Meticulously: Each part should have a label or number for easy tracking. Store bolts, screws, and smaller parts in separate containers, so they don’t get mixed up.
- Photo Documentation: Take photos at every stage. This visual reference will make reassembly smoother, helping you remember the exact placement of each part.
5. Dive into Repairs and Restoration
With the car disassembled, you’re ready to restore each component. Restoration involves everything from engine overhauls to upholstery repair, so tackle one area at a time:
- Engine Work: Cleaning, repairing, and possibly rebuilding the engine is a critical step. For guidance, check out MercedesSource for detailed tutorials and parts.
- Body and Upholstery: Address rust carefully, blending new and old materials to maintain the car’s classic appeal. For upholstery tips, YouTube has numerous tutorials tailored to classic car restorations.
6. Source Authentic Parts
To keep your Mercedes true to its roots, you’ll need genuine parts. Here’s how to find them:
- Local Scrapyards: Sometimes, the perfect piece is waiting in a nearby junkyard. Bring photos and measurements to match parts accurately.
- Online Forums and Marketplaces: Check out Mercedes-Benz Forum and eBay Motors for hard-to-find parts and advice from experienced enthusiasts.
- Mercedes-Benz Classic Parts: Mercedes-Benz offers genuine parts specifically for classic models, ensuring that your restoration remains true to the original. Visit Mercedes-Benz Classic Parts.
7. Define Your Restoration Goals
Setting a clear vision helps guide every decision you make. Decide upfront if you’re restoring a daily driver or a showpiece. This choice will influence everything, from budget to the types of parts and materials you prioritize.
- Goal Setting: Are you aiming for a modernized daily driver or preserving every original detail? Clarifying this can help make choices easier along the way.
8. Manage Your Time and Budget
A full restoration takes time and, often, more money than expected. Here’s how to stay on track:
- Break it Down into Phases: Plan for stages—assessment, disassembly, repairs, and reassembly—each with a timeline to help you track progress.
- Budget for Parts and Labor: Classic car restorations often need specific parts and expertise, especially for bodywork and wiring. Allocating funds for these areas helps you stay within budget.
9. Get Help When You Need It
Certain parts of a restoration may require expert help, especially for complex wiring or bodywork. Don’t hesitate to reach out to the classic car community:
- Forums and Groups: Join groups like Classic Mercedes Club for advice, connections to local experts, and support. These communities are invaluable resources for troubleshooting and guidance.
10. Test, Tune, and Enjoy the Results
After putting in all that work, it’s time to test your Mercedes and make any final tweaks. Take it for a spin and evaluate performance, handling, and any finishing touches needed.
- Road Testing: Testing on different roads and conditions reveals if adjustments are necessary. If you can, bring a fellow car enthusiast along—they might spot things you missed.
- Celebrate the Journey: Restoring a classic car isn’t just about the end product. Take pride in every step of the process—you’ve revived a piece of automotive history!

The Journey Begins: Step-by-Step Process for Restoring a Classic Car
Starting a restoration requires a game plan. First, assess the condition of your vehicle. Get a clear picture of what you’re dealing with—after all, every classic car has its unique quirks and history.
Sourcing authentic parts is a crucial step. The goal is to retain as much of the car’s original character as possible. Whether you’re hunting in scrapyards or scrolling through online forums, finding the right parts is both challenging and rewarding.
Bringing Your Vision to Life: How to Restore Your Classic Mercedes Effectively
Having a clear vision is crucial when bringing your classic Mercedes back to life. It starts with setting realistic restoration goals. Are you aiming for a daily driver, or is it a showpiece you’re after? Defining this will guide every decision you make.
Budgeting can’t be overlooked. Estimating costs upfront helps keep you on track financially. Think about part prices, tool expenses, and any expert assistance you might need. Allocate funds where it matters most and stick to it.
Sometimes you need a hand. Don’t hesitate to involve experts, especially for tricky spots like wiring or bodywork. The classic car community is a goldmine of knowledge, advice, and potential resources, saving you time and headache.
The Art of Restoration: What’s Really Involved in Restoring a Classic Car
Restoring a classic car is like crafting a masterpiece, blending art with mechanics. One of the first hurdles is balancing modern upgrades with preserving the car’s original vibe. It’s all about making those smart tweaks without sacrificing charm.
Rust and bodywork repairs need careful handling. Classic cars wear their age with pride, but rust isn’t part of the package anyone wants. Tackling it means blending new with old seamlessly, ensuring a smooth finish that’s both protective and aesthetically true to the era.
The electrical systems in classic Mercedes can be a bit complex. Older models have their quirks, but with patience—and maybe a few YouTube tutorials—you can navigate wiring puzzles. Modernizing some components could enhance reliability without compromising authenticity.
After investing so much time and effort, testing and tuning ensure the car’s performance matches its looks. Robust road testing tells you whether tweaks are needed, ensuring everything’s in harmony for a smooth ride.
Completing a restoration is an achievement to savor. It’s not just about the end product but the journey and skills honed along the way, turning passion into a unique piece of history.